
Peter Wells is a Glendale, Wisconsin-based independent remodeling designer serving Milwaukee and the southeastern part of the state. Working through builders or direct with homeowners, Wells creates award-winning residential design solutions for kitchens, bathrooms, lower levels and additions. He belongs to the local NARI chapter & his new company is in its fourth year of production.
In the remodeling business, every new project brings its own unique design challenge. Solutions often have to be submitted with in very short window of time. For one project, the Milwaukee Neighborhood Improvement Development Corporation (NIDC) sent out an RFP to area contractors for a whole-house remodel on a foreclosed property on the city’s north side.
The deadline was a very tight two-and-a-half weeks from the issuing of the RFP to the submission of proposals. My time frame was made even shorter as it took several days for us to determine the feasibility of the project after meeting with the director of the program at the contractors’ open house.
Using SketchUp Pro provided us a way to meet the short deadlines and easily communicate our design ideas in detail in order to fulfill RFP requirements.
When we decided to give the project a go, the site was measured on a Tuesday. A rough ‘as-built’ model was created and preliminary plans were reviewed with my builder on Friday (three days later). By the following Tuesday, the “proposed” model was completed, and the next day the LayOut documentation shown below was finished—two days before deadline!
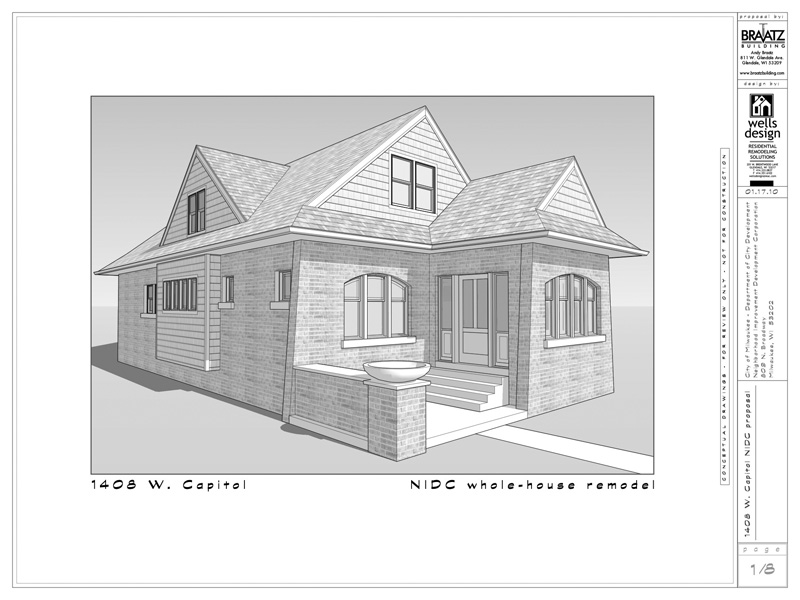 “As-built” SketchUp model in a LayOut document
We were not allowed to present our design in person at the first stage of the review process, so we wanted to include as much information in our documentation as possible. Using LayOut’s ability to annotate the drawings, we made our case page by page.
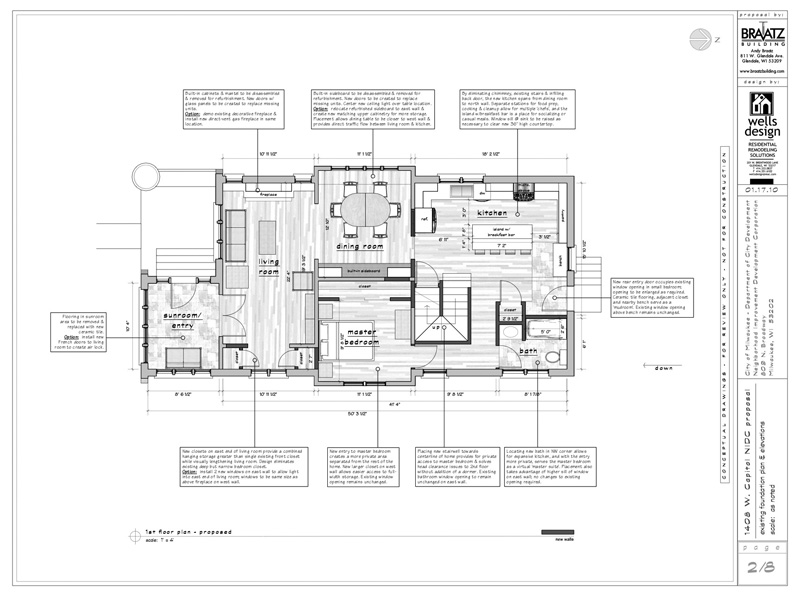
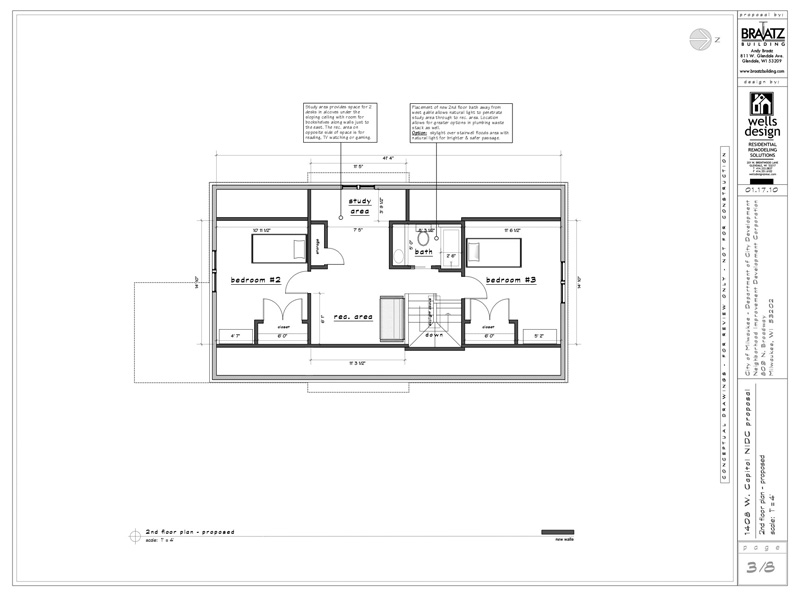 Floor plans with details addressing RFP requirements
The floor plans show all of the descriptive text boxes explaining where we met the RFP requirements, as well as where we proposed changes to enhance the plan or simplify the construction.
The house itself was in good structural shape, but the interior was pretty rough, with the RFP acknowledging that the north end of the 1st floor and the entire 2nd floor would need to be gutted and refurbished. Using the Google 3D Warehouse to best effect, I was able to quickly populate the model with furniture and appliances to provide a human scale and clues as to how the home might be lived in.
The exterior elevations and sections are created from the same model, continuing the annotation that would satisfy the RFP. The section cuts are “enhanced” with shaded geometry created in LayOut as the time frame didn’t allow for what I might normally more carefully model in SketchUp Pro.
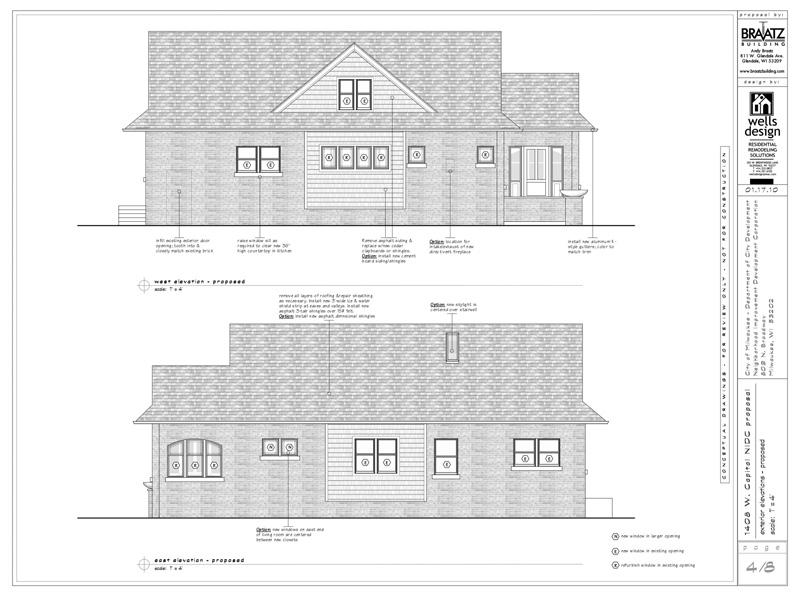
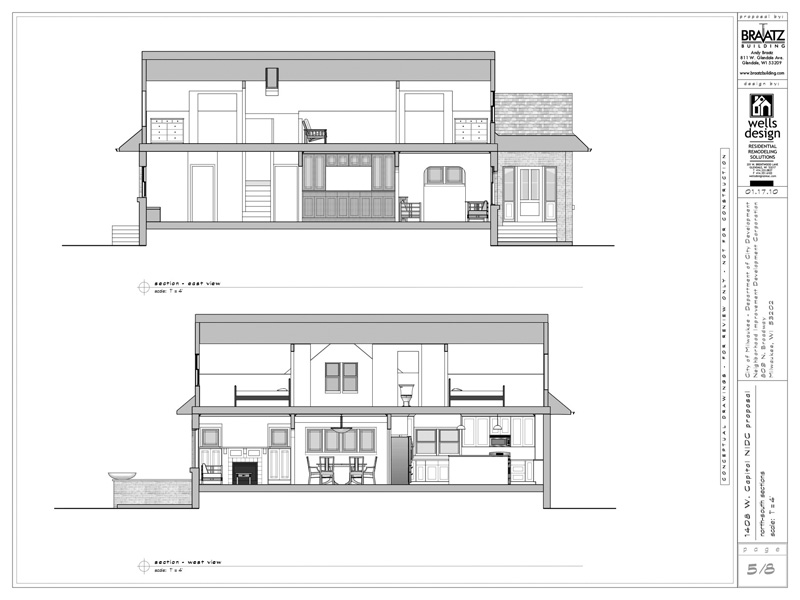 Elevations and Sections (East & West)
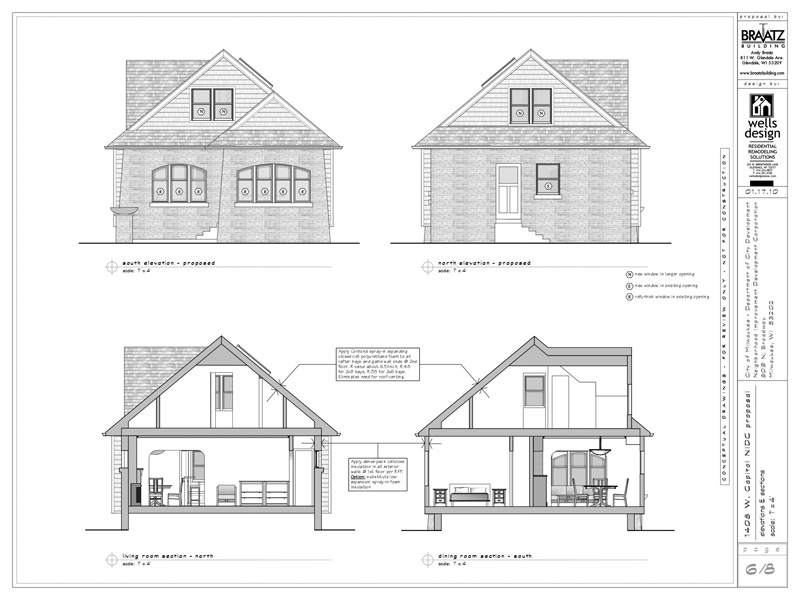 Elevation and Sections (North & South)
Finally, I added several perspective views to help the committee get a complete understanding of our proposal. One page shows an overhead view of the first and second floors with the ceilings removed to see the home from end to end, and then the final page shows an eye-level perspective from the key rooms on the first floor.
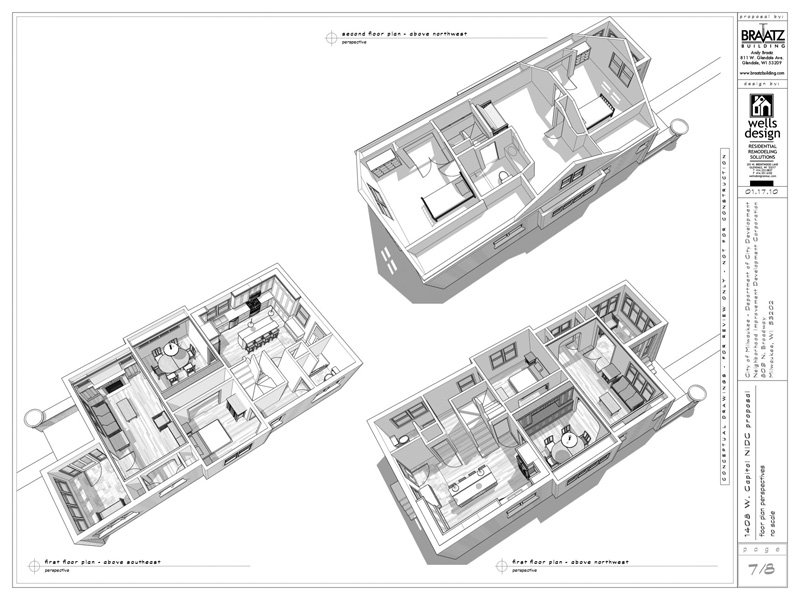
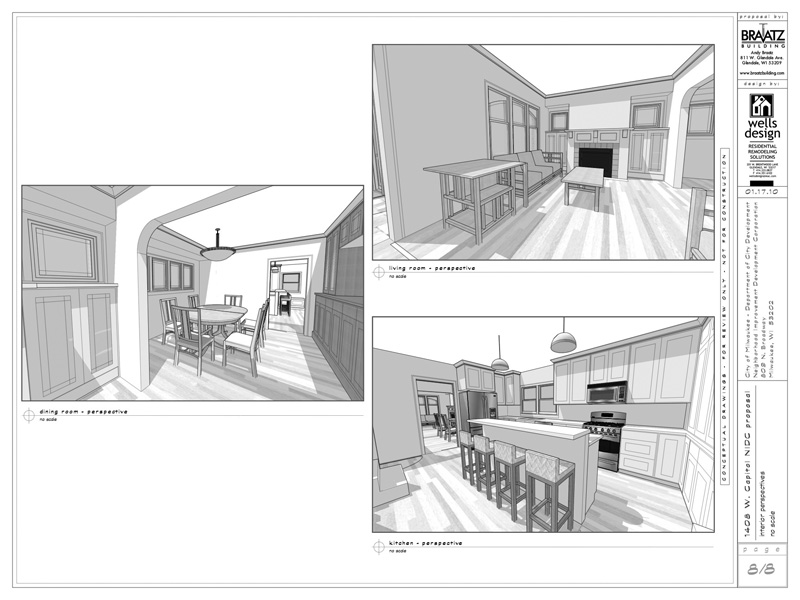 Perspective views help to ensure a complete understanding of the proposal.
With SketchUp’s powerful modeling features, I was able to set all of these plan, elevation, section and perspective views using Scenes. With the model dynamically linked to LayOut, final tweaks and edits done in SketchUp were automatically updated in the LayOut document instead of having to rework entire drawings.
In this instance, the SketchUp Pro and LayOut features enabled me to create a comprehensive presentation under a very tight deadline that impressed both the committee and my builder.
Once our clients see it in 3D, they instantly get the concept. This allows for better feedback and generally leads to a quicker arrival of the final design solution. My favorite compliments come at the end of a project when a client says, “Iit looks just like the model!”

6 comments :
Well done... excellent work.
Good Work Peter! Congrats on the recognition.
This is great! I have used Sketchup for years for modeling and such, but have only recently started to use it more for presentations and with Layout. A question I have, is your materials that you use with a white background, or do you have some kind of style. Whenever I use a pencil type of style, my materials just go blank.
Really nice work and an interesting read.
This will help with a paper I am writing on how 3D software has changed the way interiors are designed and built today.
@Terence: As you can see, all of the materials shown in my presentation are grayscale to help differentiate materials & surfaces. Some of SU's stock materials (like shingles) can be too dark & overpowering for printing or notations, so I like to control that.
You can change any material applied on a model to grayscale by editing it in the Materials palette (using the grayscale slider), and choose the "shaded with textures" style to maintain their visibility.
Oi, quando vocês vão lançar uma versão on line?
Post a Comment