
With all the hullabaloo about Personal Fabrication lately, scads of committed SketchUp modelers are getting very excited about turning their digital models into honest-to-goodness, physical things. The idea is thrilling, but the process of actually going “from idea to object” can be intimidating. The PF train is just leaving the station, but with a little bit of help, anyone who knows their way around SketchUp can climb aboard. I promise.
Getting Started
The first thing to realize is that there are basically two types of personal fabrication (at least when it comes to SketchUp.) The technologies are completely different and each is appropriate for specific kinds of objects. Which one you choose depends entirely on what you’re trying to make.
2D CNC Fabrication
2D CNC Fabrication is all about cutting parts out of flat sheets of material. These flat pieces are then manually assembled into a 3D object by means of slots, fasteners or glue. The challenge lies in designing the “kit of parts” such that everything fits together. You’re actually making two models: one to design the final assembly (Image 1) and one that lays out all the pieces for cutting (Image 2).
 Image 1: Build the first model to design the final assembly of parts and pieces. This is John Bacus’ design for the SKPRbot that we’re giving away at Maker Faire this weekend.
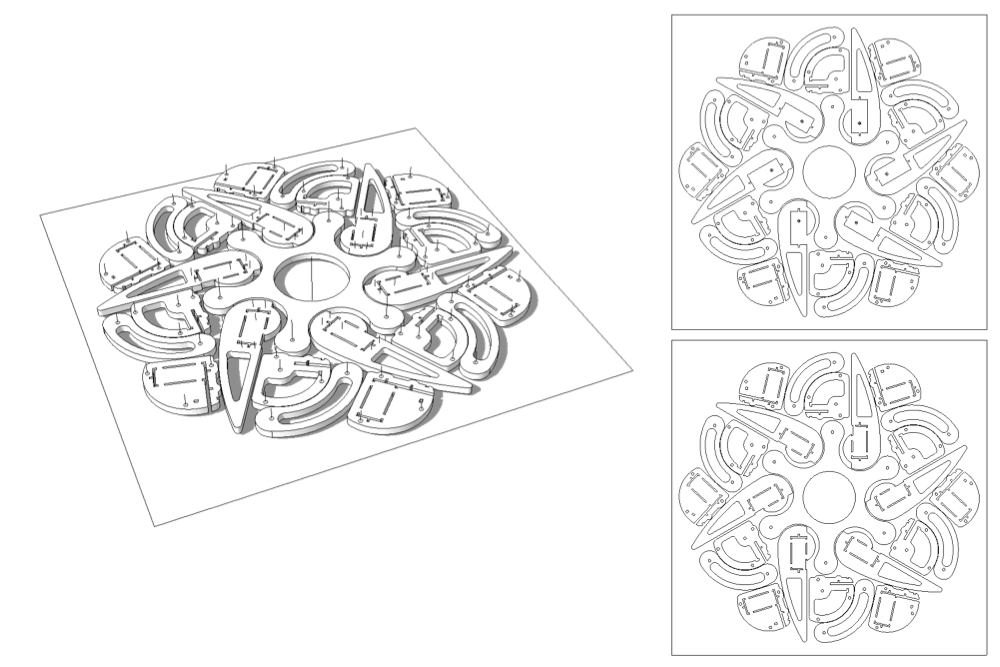 Image 2: Your second model lays out the pieces on a flat cut sheet. Since cost is directly related to the amount of material you use, you’ll save money by designing efficiently. The cut sheets on the right are just Top views of the model on the left (with Perspective turned off.)
 Image 3: A rendering of a completed SKPRbot. This one’s been cut out of several different-colored sheets of translucent acrylic.
The cost of CNC-made stuff is generally a function of two things: material type and material quantity. Because of this, it behooves you to design your “cut sheets” as efficiently as possible. Squeeze parts together to save money. The materials available to you are many; wood, metal, cardboard and plastic are all options.
One more thing about CNC: There are lots of ways to cut things out. Some machines use lasers, some use water and some use metal bits like the ones you find on a router. Knowing which cutting technology you’ll be using is important because lasers, water and metal bits have different kerfs, or cutting widths (Image 4, below). Obviously, that’s something to keep in mind as you’re designing your cut sheets.
 Image 4: Kerf is the width of the cut left by whatever tool is doing the cutting. Lasers have negligible kerfs; CNC routers have more significant ones.
If you’re planning to buy your own CNC hardware, I’d recommend having a look at ShopBot. Their machines are of the “metal router bits” variety; their focus is predominantly on woodworking.
If, on the other hand, you’d prefer to work with a service provider who can cut out your project and ship you the parts, you’d do well to peruse Ponoko’s website. It’s well-designed, beginner-friendly and affordable. To send a 2D cut sheet file to Ponoko, you’ll need to export an EPS file using Google SketchUp Pro. Beyond that, their 2D Design Tips page is super-helpful.
Additive Manufacturing
Additive manufacturing (or 3D printing, as less fancy people call it) involves squirting material onto a platform. Starting at the bottom and working up, layers are “printed” on top of each other until a 3D object is formed. Different 3D printing machines use plastic, resin, powder (which is hardened into a solid) and even metal. Printed objects can be monochrome or multi-colored.
 Image 5: No matter how you’re 3D printing, the first step is to make a “solid” model. Skip down a few paragraphs to learn more about what this means.
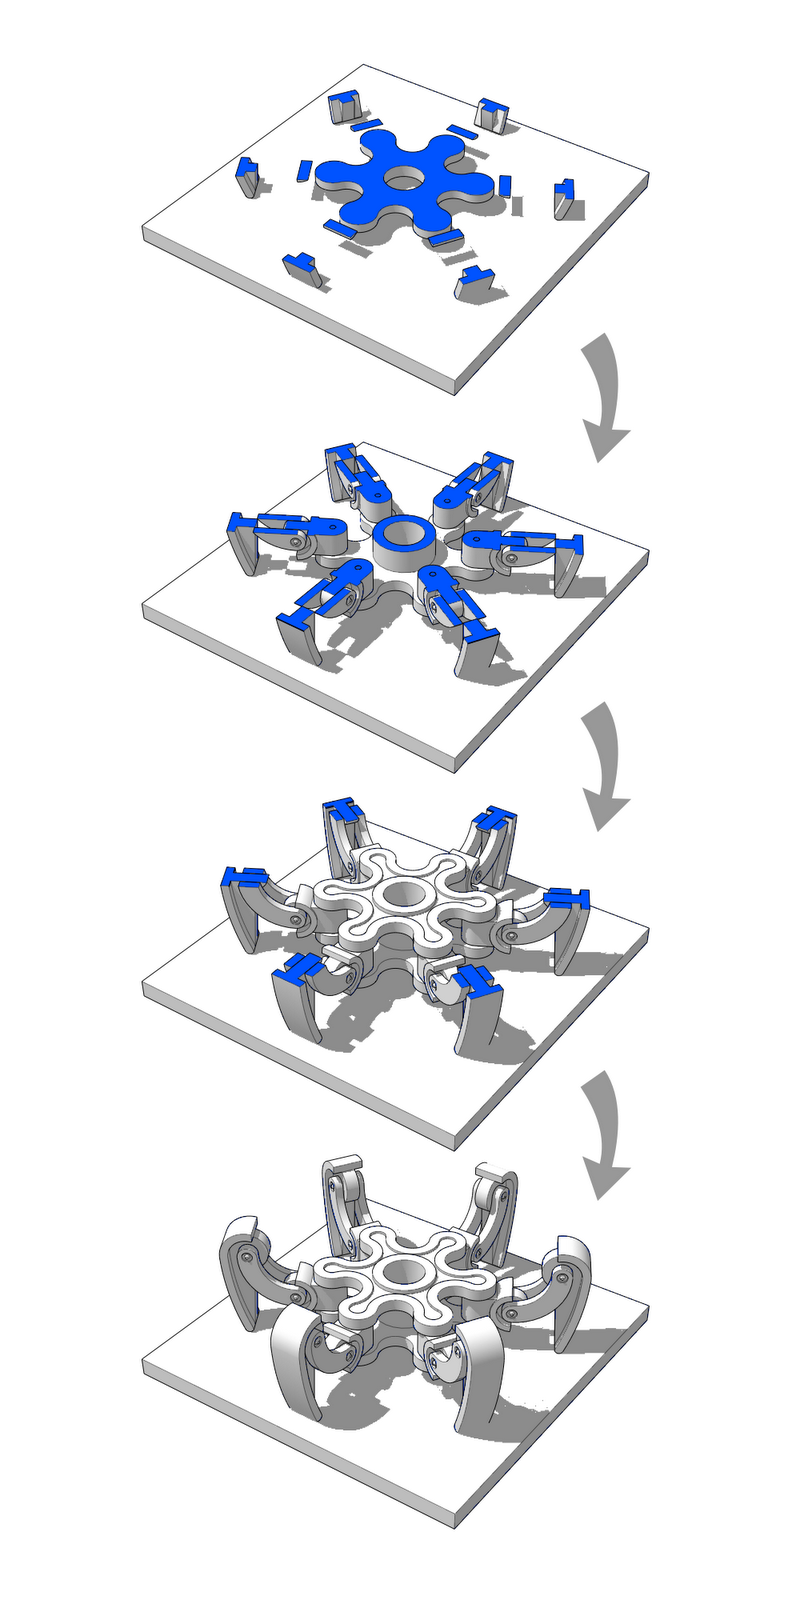 Image 6: 3D printers build up layers of material in order to create 3D objects. Temporarily floating elements sometimes need sprues or other forms of support, but these aren’t show in the pictures above.
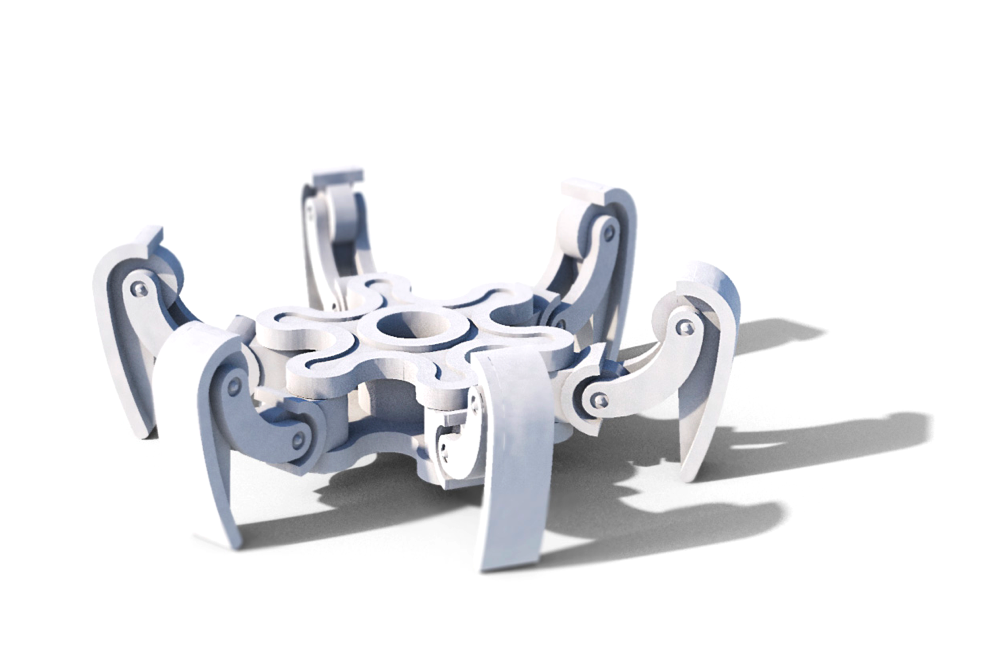 Image 7: A rendering of a solid-printed SKPRbot. This one is monochromatic because it’s made from a single material, but 3D prints can also be multicolored if you use the right machine.
In general, the cost of additive manufacturing is based on the physical size of the thing you’re trying to print. Most machines top out at objects that are about the size of a lampshade. Choosing fancy materials (like stainless steel) can be pricey, but palm-sized objects printed in resin or plastic are surprisingly economical.
Some machines can even produce interconnected, moving parts by printing a second type of material where voids occur. After the whole thing is made, the second material (it’s often wax) is melted away, leaving just the main components. This is a great way to prototype close-fitting connections like ball-and-socket joints and threaded parts.
The biggest gotcha when it comes to modeling 3D printables with SketchUp has to do with solidity. Every printed object is made out of solid material, whereas every SketchUp model is completely hollow. What’s a devoted SketchUpper to do?
The answer is to create a model which can be considered solid. A solid model (as far as SketchUp’s concerned) is completely enclosed; if you filled it with water and shook it, none would leak out. Happily, one of the features we added to SketchUp 8 is a solidity-checker. The Entity Info dialog box tells you if a group or component is solid. (See Image 5, above.) You can read more about this (and about the Solid Tools in SketchUp Pro 8) in this post from last year.
Buying your own professional-quality 3D printer will set you back about as much as buying a nice car. If that’s a problem for you (it is for me) there are hobbyist machines that you can buy and assemble yourself. They’re all offshoots of the RepRap project, but the best-known and most commercial units are sold by MakerBot Industries. For less than $1500, you can have a personal fabrication facility in your dining room. A huge community of enthusiasts are exploring SketchUp (and other software) workflows online. These are exciting times, to be sure.
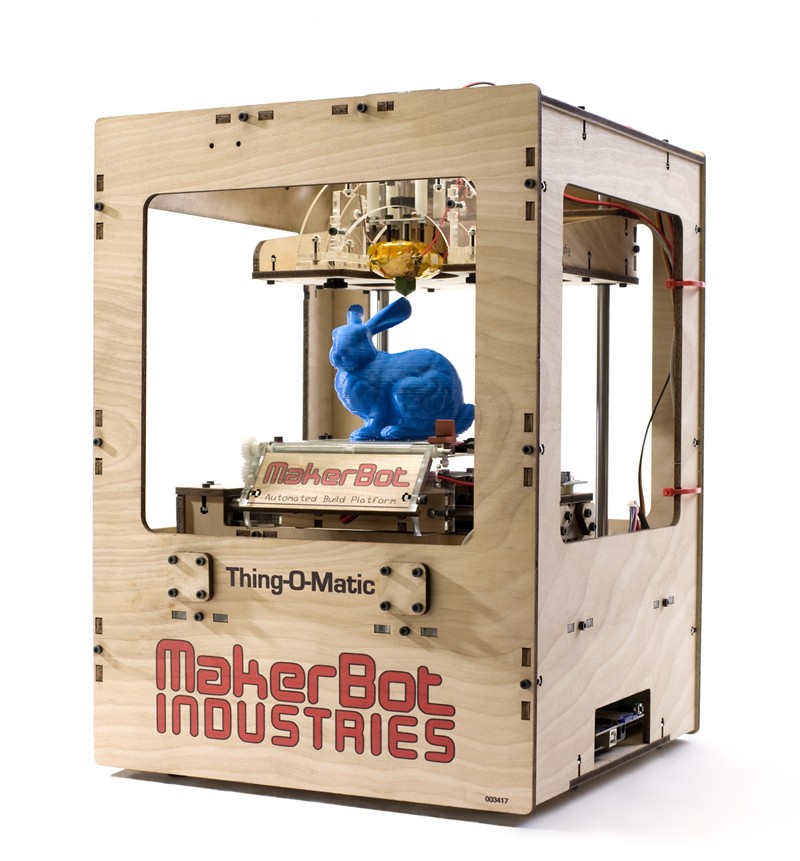 Image 8: The Thing-O-Matic from MakerBot industries costs all of $1299. Blue bunny not included.
For the less DIY-inclined among us, there are plenty of great 3D printing service providers who can handle the messy business of actual output. All you do is upload a 3D model and wait for your object to arrive in the mail. Ponoko (mentioned above in the CNC category) is an option; their SketchUp workflow is simple and straightforward.
Another great service provider is i.materialise. With equipment capable of 3D printing human-sized objects and years of experience rapid prototyping things like artificial heart valves, this company is very, very capable. Even better, their SketchUp plugin makes 3D printing as painless as possible.
Update: Also check out www.shapeways.com if you're looking for a 3D printing service provider. Shapeways likes SketchUp, too : )
In the next few weeks, we’ll follow up on this post with specific examples and step-by-step workflows for various personal fabrication methods. Stay tuned!

14 comments :
Nice primer, we also see some mind blowing items getting 3d printed at www.shapeways.com that use SketchUp.
Thanks
Duann
Amazing.. Nice product..
Zamre Bin Ab. Wahab
I like this Intro-to-personal-making post...hope to see some more case studies soon!
that's what I like !
great post !
Hello
Don't forget the CADspan plugin for Google Sketchup previously reviwed in the Google Sketchup Blog. http://sketchupdate.blogspot.com/2009/01/3d-printing-from-sketchup-with-cadspan.html
We are looking for help with a version 2.5! Contact us if you are interested - cwho@lgm3d.com
Hi Charles-
You're absolutely right, and we should have pointed CADspan out. Still my favorite skp->stl conversion path as well.
If you haven't seen the post Charles mentions, it is worth reading through. I wonder if it would be worthwhile to do a little 'rollup' of past posts we done here about 3D printing?
john
.
Great article.
I have often wondered why there is no real animation options and rigid body components in SU.
It would be great if SU got a fresh new companion, or add on if you like.
Google Mockup certainly has a nice ring to it, and that's exactly what this companion would be used for:
Making mockups of mechanical models of all sorts, allowing designers to test their ideas for functionality before making them in real life.
Just imagine being able to make all the components for an engine, making them rigid (or semi compressable, as eg. rubber?)Then add animation paths to each component, or simply add a pivot point and a range of movement to them before you start your engine...
IMHO this would make SU the greatest educational tool ever...
John,
I like it, how can I buy??? Would you sell it to me?
Great post. Very interested in using SU for product manufacturing.
On another note, what line style is the SKPRbot drawn in? Are the images exported dwgs that are cleaned up in CAD or Illustrator? They look clean.
Brian
A great low cost quality 3d printer thats so easy to use that your mother in law can print out new jaws for nagging you with. The Up printer deserves a mention from www.3dprintingsystems.com prints in 0.2mm detail in ABS or PLA. The software is pure genius and very easy to use!
Great article!
Im a design and technology teacher and Im really passionate about rapid prototyping, but it can be difficult to explain such a new method of manufacture without using all the technical words and losing all the enthusiasim! I use the ink-jet analogy, but in future I am totally directing students to this link!
nice to see that the technology is getting cheaper and that they are doing new things like using wax to fill voids, instead of messy powder (I found it a really tricky job to remove out of fragile tight joints)!
I think it should be said that the Makerbot is among the worst of "DIY" 3D printers.
The Prusa Mendel RepRap is the best DIY 3D printer currently available and is used my the majority of the 3D open-source printing crowd now.
A reliable, fast, and above all, cheap, printer.
--Nathan
Very informative enhances my knowledge a lot...
When it comes to fabrication then choosing a specific technology totally depends on the object you are creating. CNC processes are generally used for 3-D and 2-D designs.
CNC Fabrication and Routers
Post a Comment